

Do you want to know How to measure Facebook ad conversions effectively and accurately to maximize the ROI of your advertising campaigns? This article will provide the answer, including detailed instructions, supporting tools, and useful tips to help you master this process.
Reasons to measure Facebook ad conversions
Measuring Facebook ad conversions is a crucial step in tracking and analyzing customer behavior after interacting with your ads. This process helps evaluate campaign effectiveness, determine whether objectives are being met, and optimize advertising strategies.
Additionally, measuring conversions offers benefits such as understanding the customer’s purchasing journey, improving user experience on the website, and optimizing budgets by eliminating irrelevant audience groups. This helps businesses reach the right target customers, enhance advertising effectiveness, and reduce unnecessary costs.
Types of conversions today
Website Conversions
These are actions users take on your website after interacting with an ad, such as making a purchase, adding items to the cart, viewing content, or signing up for an account. To measure these, you need to set up Facebook Pixel – a tool that tracks activities on your website. Pixel helps you analyze campaign performance and optimize ads, especially for retargeting campaigns.
App Conversions
This type of conversion tracks actions within a mobile app, such as app installations, app launches, or in-app purchases. The Facebook SDK needs to be integrated into the app to monitor these actions. The SDK also supports setting up custom events, which are especially useful for gaming or e-commerce apps.
Offline Conversions
Offline conversions measure actions such as in-store purchases, phone calls, or appointment bookings. To track these, you need to upload customer data to Facebook to match the user information. This type of conversion helps assess the impact of advertising on actual business outcomes.
Simple ways to measure Facebook ad conversions
Step 1: Create a Facebook Pixel
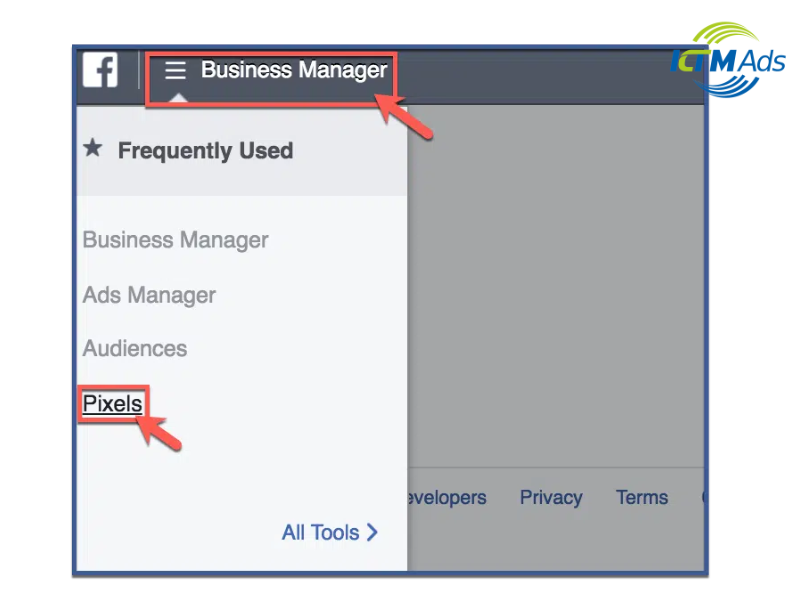
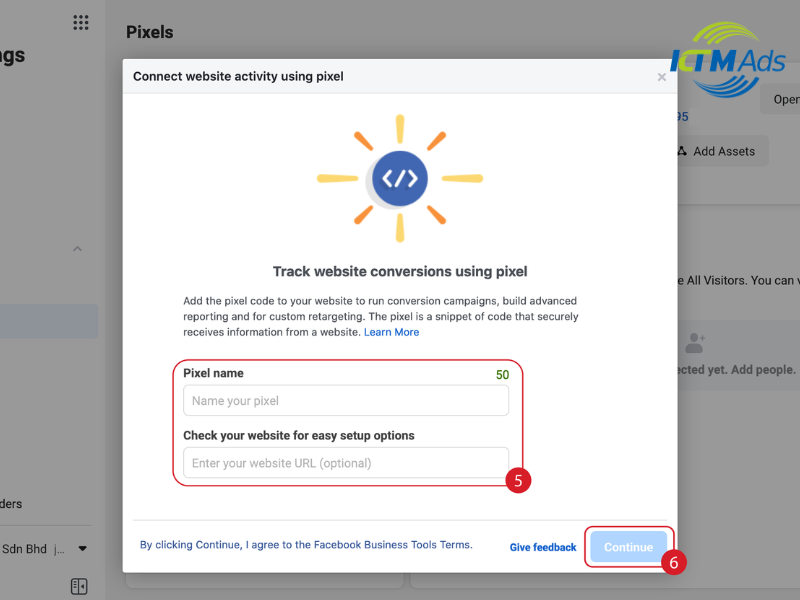
Facebook Pixel is an essential tool for monitoring website conversions. Follow these steps to set up a Pixel:
- Open Ads Manager → go to Tools → select Pixel → click Create.
- Name the Pixel according to your website for easier management.
- Copy the Pixel code provided by the system.
Step 2: Install the pixel on your website
Once you’ve created a Facebook Pixel, the next step is to add the Pixel code to your website. Place the code right before the closing tag in the source code of your site.
- If you have access to the source code, you can directly paste the code into the header.php file.
- If you’re not familiar with coding, you can use Google Tag Manager or tag management plugins to set it up.
Step 3: Verify your website with Facebook
To ensure the Pixel functions correctly, verify your website ownership using one of the following methods:
- Paste the meta tag provided by Facebook into your homepage.
- Upload the HTML file provided by Facebook to the root directory of your website.
- Use Google Tag Manager for quick verification.
Step 4: Set up conversion events
Once the Pixel is successfully installed, you need to set up conversion events to track user actions, such as purchases, sign-ups, or video views.
- Go to Event Manager in Facebook Ads Manager.
- Select Facebook’s standard events like Purchase, Add to Cart, or View Content, or create custom events to track specific actions you want to monitor.
Step 5: Test and monitor
Use the Pixel Helper tool to check if the Pixel is functioning correctly. Then, track conversion events in Facebook Ads Manager to evaluate your campaign’s performance. Based on the collected data, you can optimize your ad campaigns, adjust goals, or modify budgets to achieve the best results.
How to effectively measure Facebook ad conversions?
To measure Facebook ad conversions effectively and collect accurate data, you need to consider the following points: Accurate pixel installation: Ensure that the Facebook Pixel is correctly installed across the entire website.
Use Google Tag Manager to manage the website if it is complex. Identify and set up detailed conversion events in the Event Manager to collect precise data.
Define the conversion window: Choose a conversion window that matches the purchasing cycle of your product/service. A longer window is suitable for high-value products (e.g., 30 days), while a shorter window is better for fast-moving consumer goods (e.g., 1-7 days).
Test the pixel using debugging tools: Use Facebook Pixel Helper (a Chrome extension) or Google Tag Manager to check the Pixel’s functionality and events, detect issues, and fix errors.
Analyze data regularly: Regularly monitor and analyze conversion data in Facebook Ads Manager, focusing on key metrics such as conversion rate, cost per conversion, and conversion value to identify trends and adjust your campaigns.
Combine with other analytics tools: Integrate data from Facebook with Google Analytics to gain a deeper understanding of user behavior on your website after clicking on your ads.
Common errors when measuring conversions and how to fix them
Pixel not working or incorrectly installed
If the Pixel code is not correctly placed in the required locations on your website, it will fail to capture conversion data. This can reduce the effectiveness of your advertising campaigns because you won’t collect data on user actions such as purchases, adding items to the cart, or sign-ups. To fix this issue, use tools like Facebook Pixel Helper to check if the Pixel is activated on your website. Additionally, ensure that the Pixel code is correctly pasted just before the closing tag in the website’s source code.
Conversion events not set up correctly
This error occurs when conversion events are not set up correctly or are incomplete. To fix this issue, go to the Events Manager and review the conversion events you have configured. Additionally, you can set up custom events to track specific user actions that are not included in Facebook’s default events.
Pixel blocked by browsers or security software
Another common issue is that the Pixel can be blocked by users’ browsers or security software, resulting in conversion data not being collected. Browsers like Safari or ad-blocking software may prevent the Pixel from functioning, causing data to fail to be sent back to Facebook.To address this issue, you can use the Facebook Pixel Helper tool to check if the Pixel is being blocked. If it is, adjustments to security settings or disabling ad-blocking software in the browser may be required.Measuring Facebook ad conversions is an ongoing process that requires staying updated with the latest knowledge. To ensure you don’t miss important information and optimization strategies, follow KTM Ads – rent a Facebook ads account regularly to equip yourself with valuable advertising insights.
> See more related articles about Facebook Ads written by KTM:
How to run ads in Facebook groups
How to run effective & successful Facebook ads
Steps to create Facebook ad content